Seal is a medium rated machine on HackTheBox by MrR3boot. For the user part we will find the default credentials for a tomcat installation inside a GitBucket repository and bypass mutual authentication by breaking the path parser logic. Once logged in we’ll deploy a war file to gain a reverse shell and abuse a running ansible task to retrieve the user Luis’s private ssh key. Getting to root is rather quick, since Luis can run ansible playbook as root on any configuration file.
User
Nmap
As usual we start our enumeration with an nmap scan against all ports, followed by a script and version detection scan against the open ones to get a first overview of the attack surface.
All ports scan
1 |
|
Script version scan
1 |
|
GitBucket && Tomcat
Going over to port 443 we see a vegetable shop, but poking at it there does not seem to be any appearent vulnerability at hand.
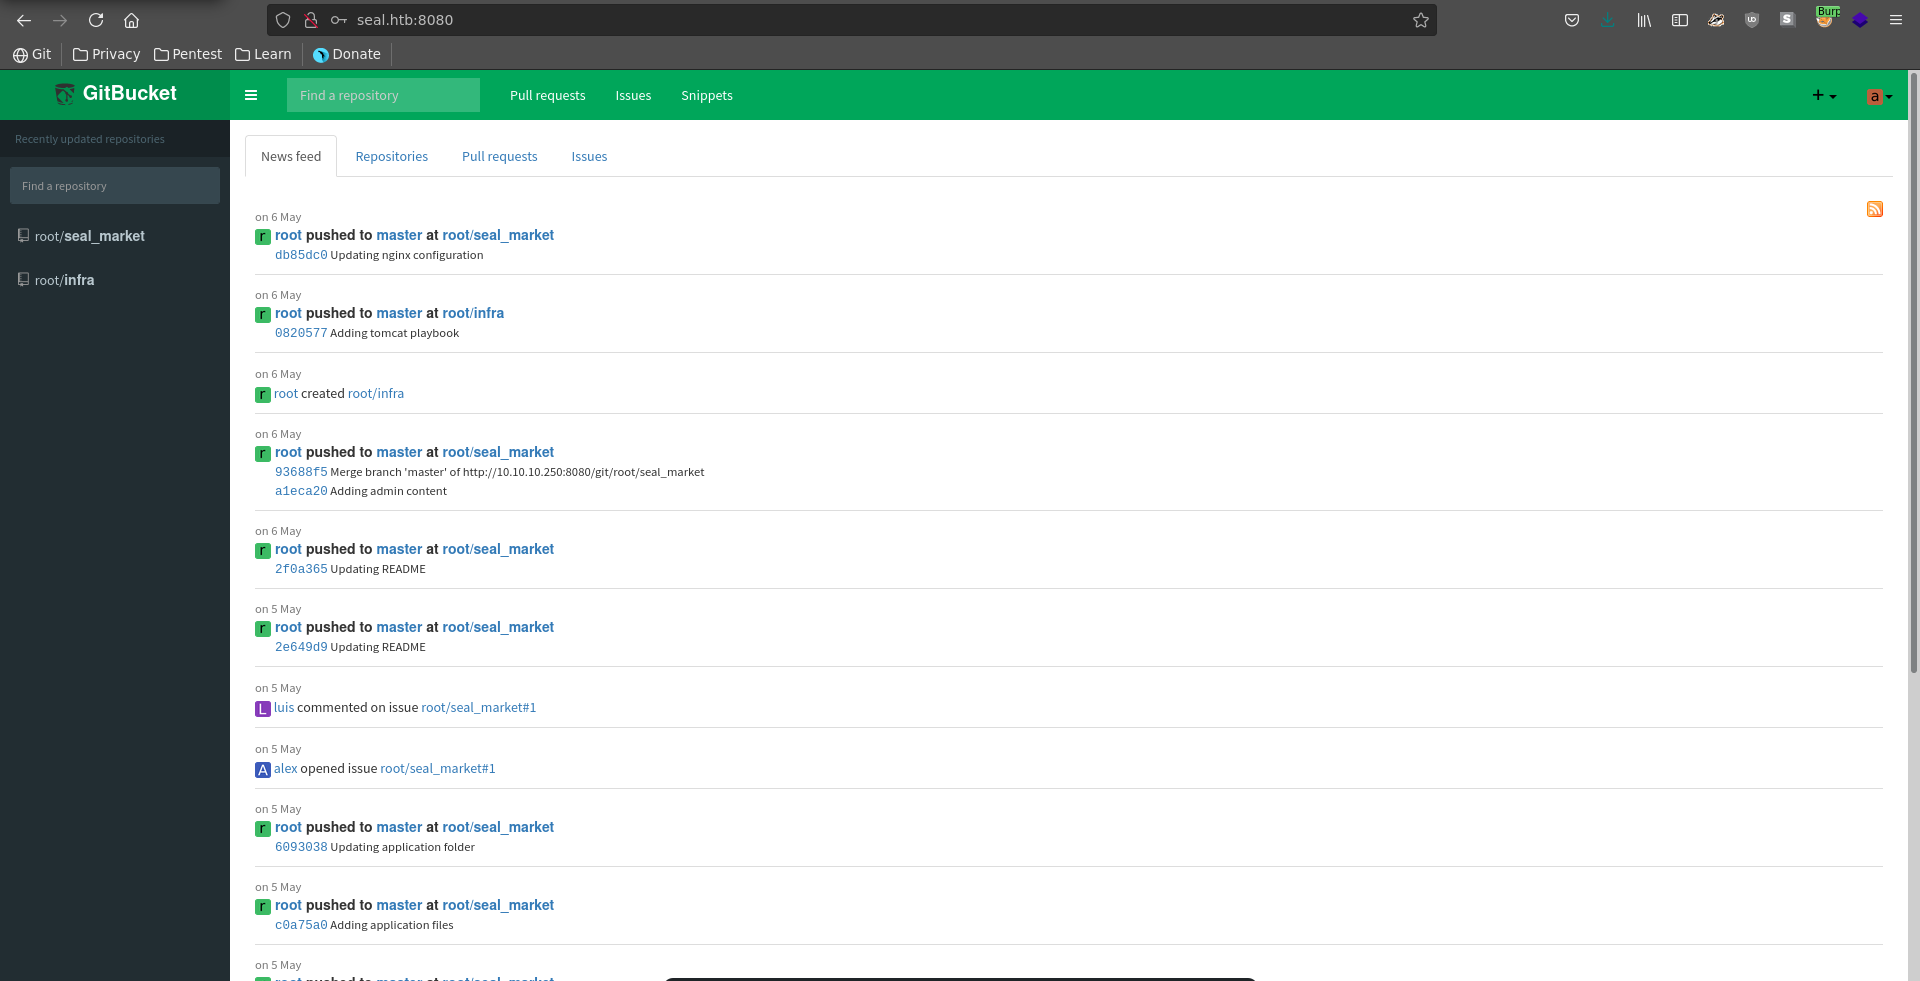
What looks a lot more interesting is the GitBucket installation on port 8080. We are able to register a new user and log in afterwards.
Being logged in we can see activities in two different repositories seal_market and infra.
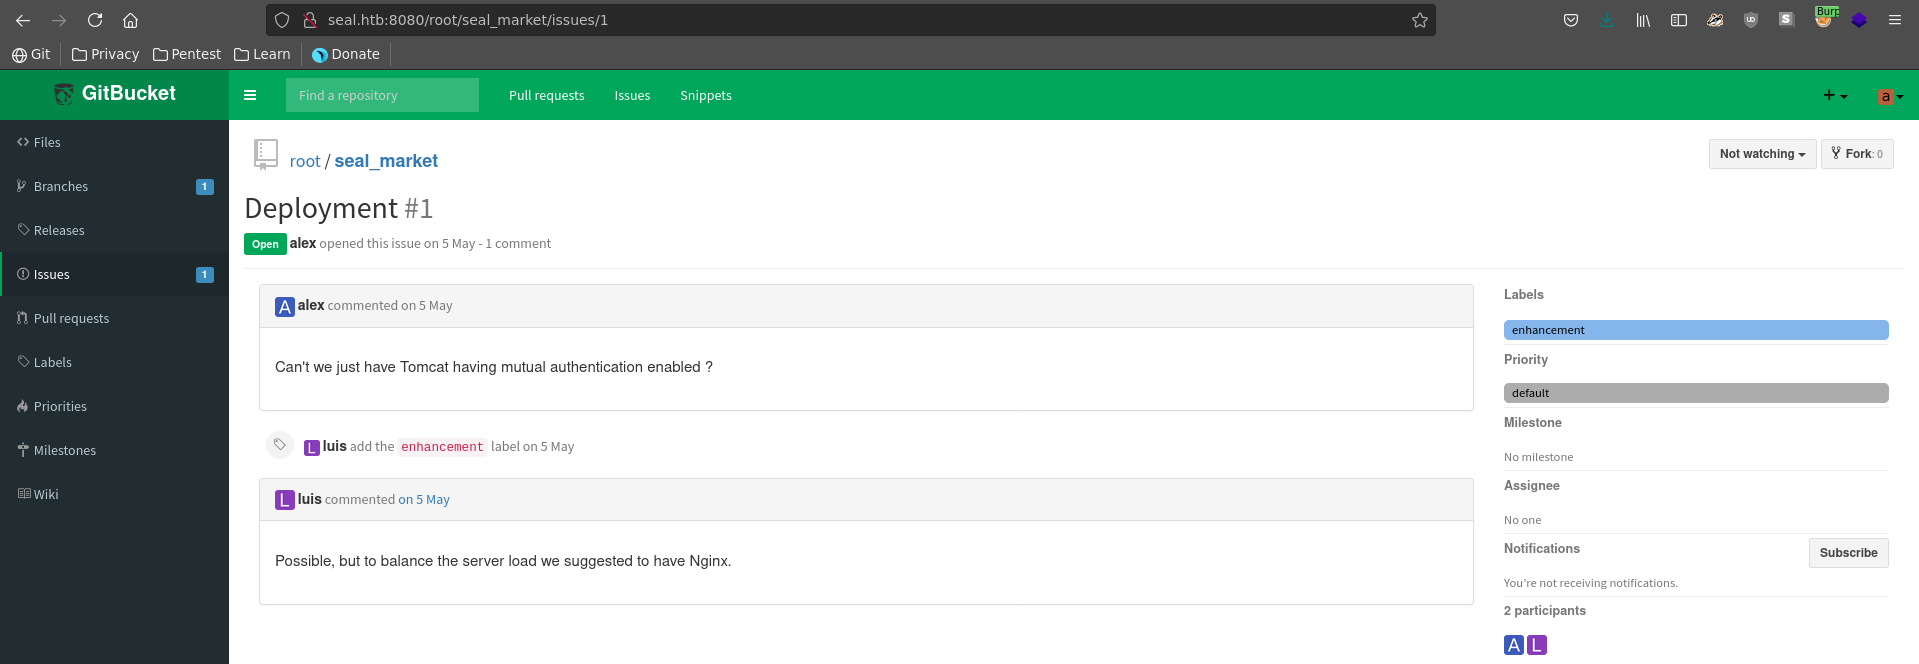
Seal_market has a current issue open between Alex and Luis about implementing mutual authentication for tomcat.
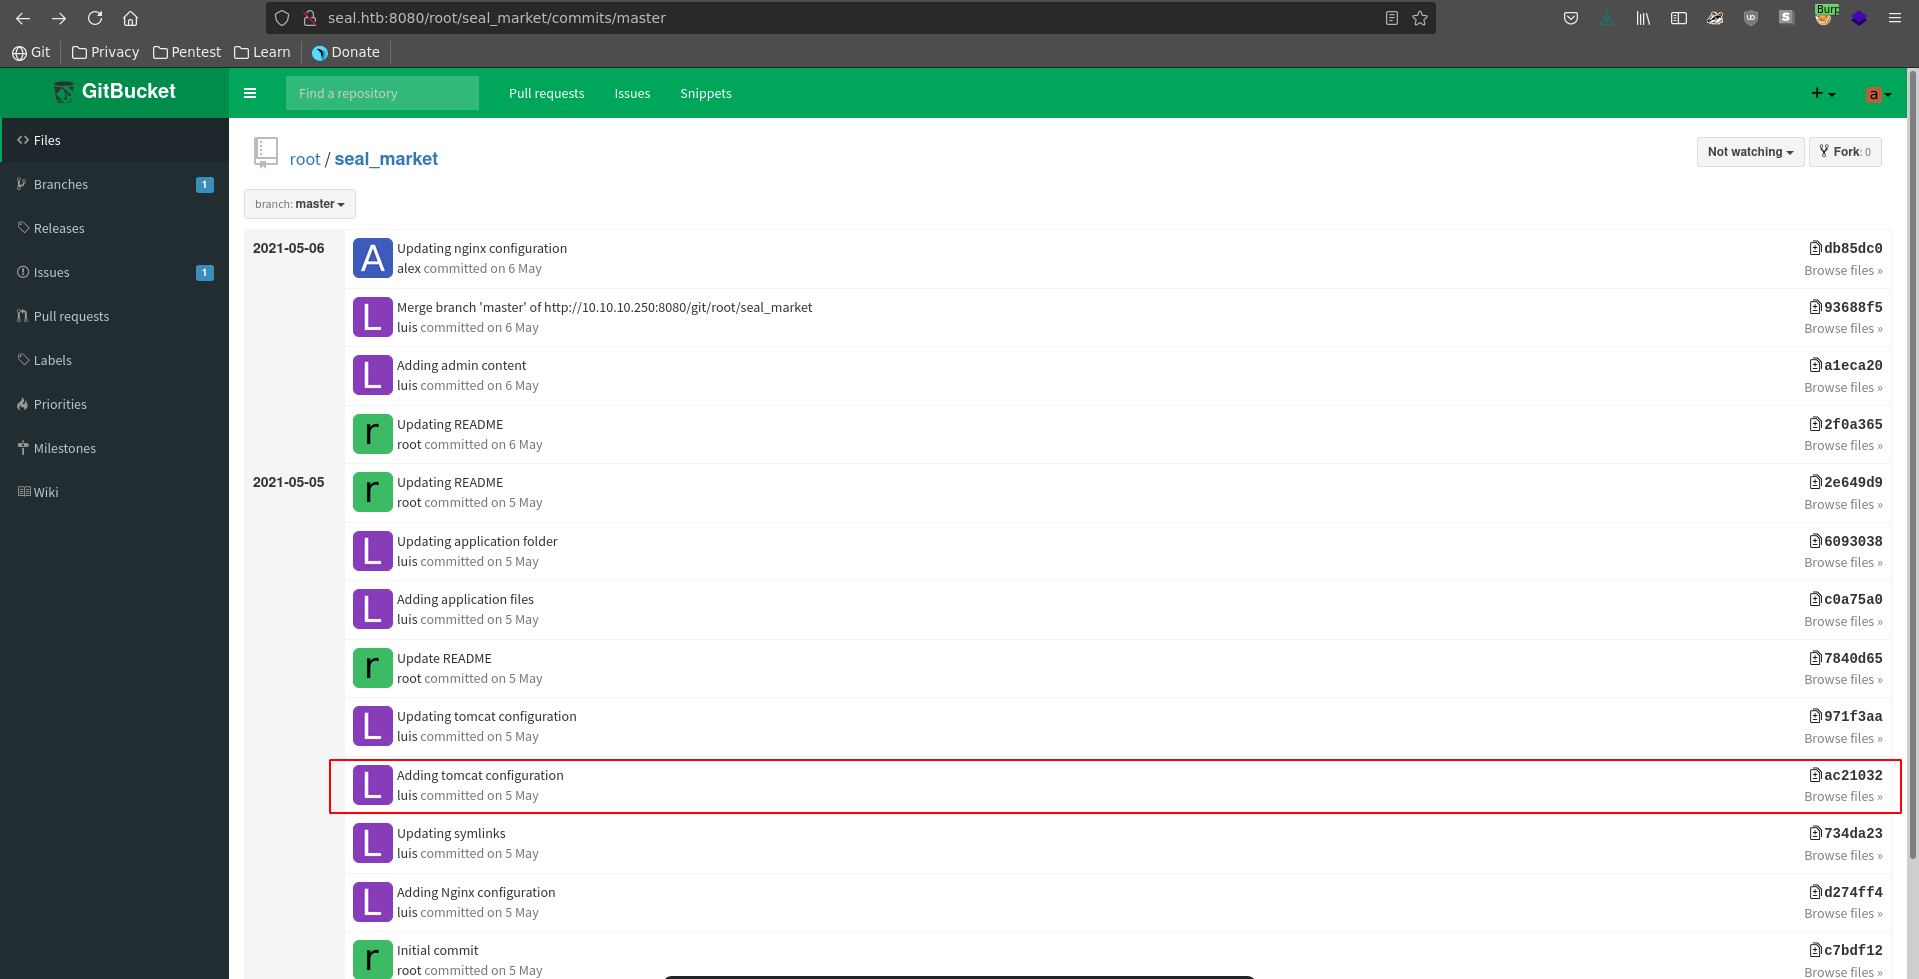
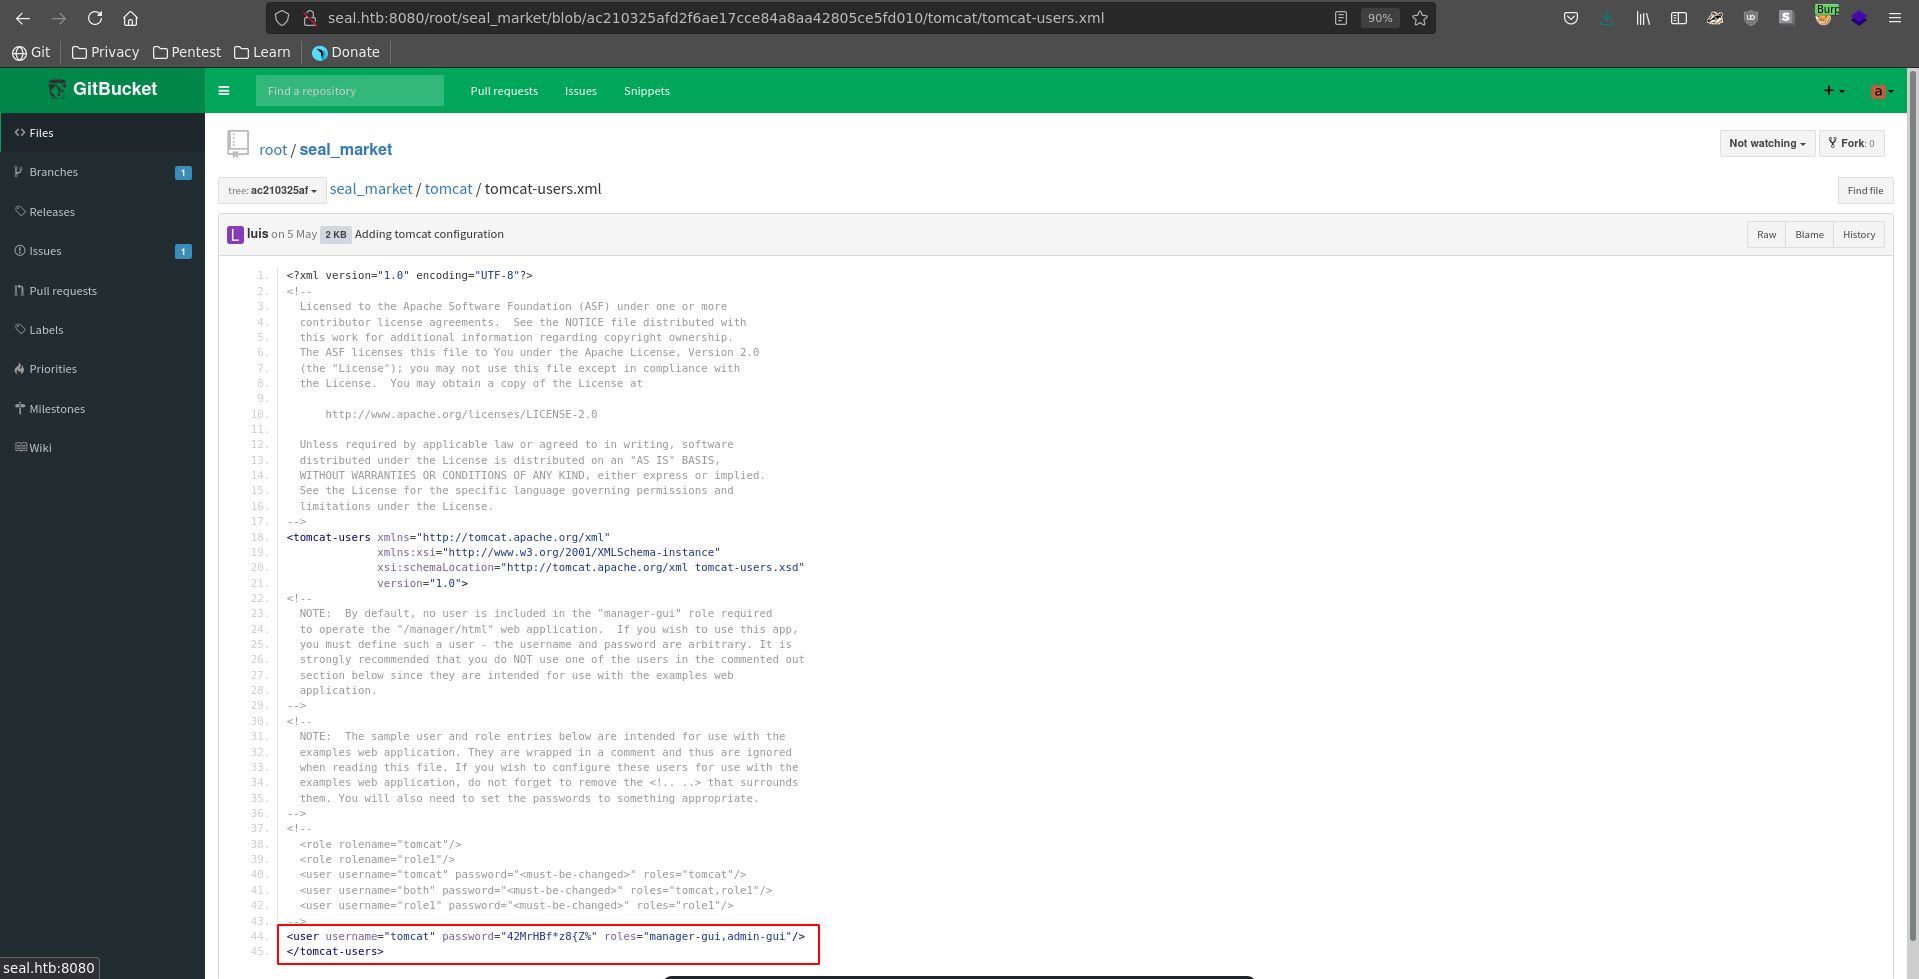
Looking at the tomcat-users.xml we see it does currently not feature a password for the installation. Going back in the commit history we might be able to retrieve the password though in an earlier commit.
Opening the inital tomcat commit we are indeed lucky and can retrieve the credentials tomcat:42MrHBf*z8{Z%.
Browsing to the standard managar url though gives us a 403 access denied error, which makes it seem that mutual authentication has indeed been enabled.
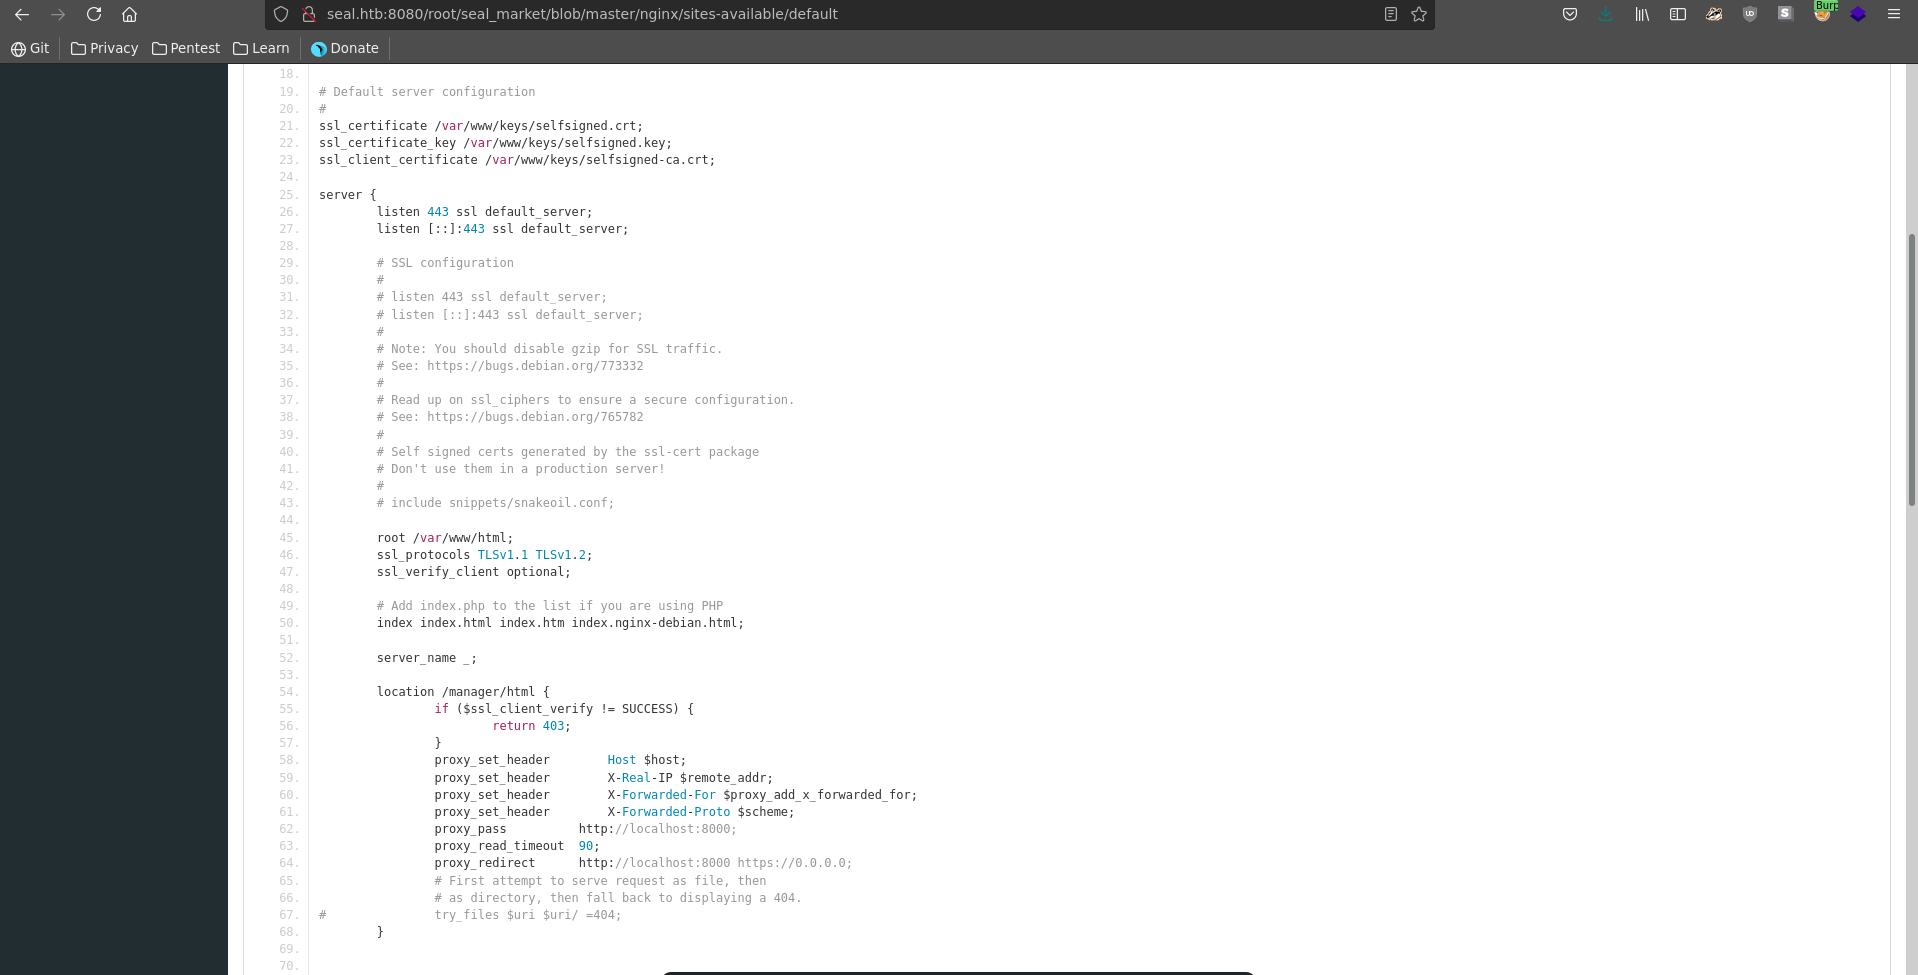
The actual reason for this can be found in seal_market/nginx/sites-available/default, which states to show a 403 on /manager/html if client TLS auth is not successful.
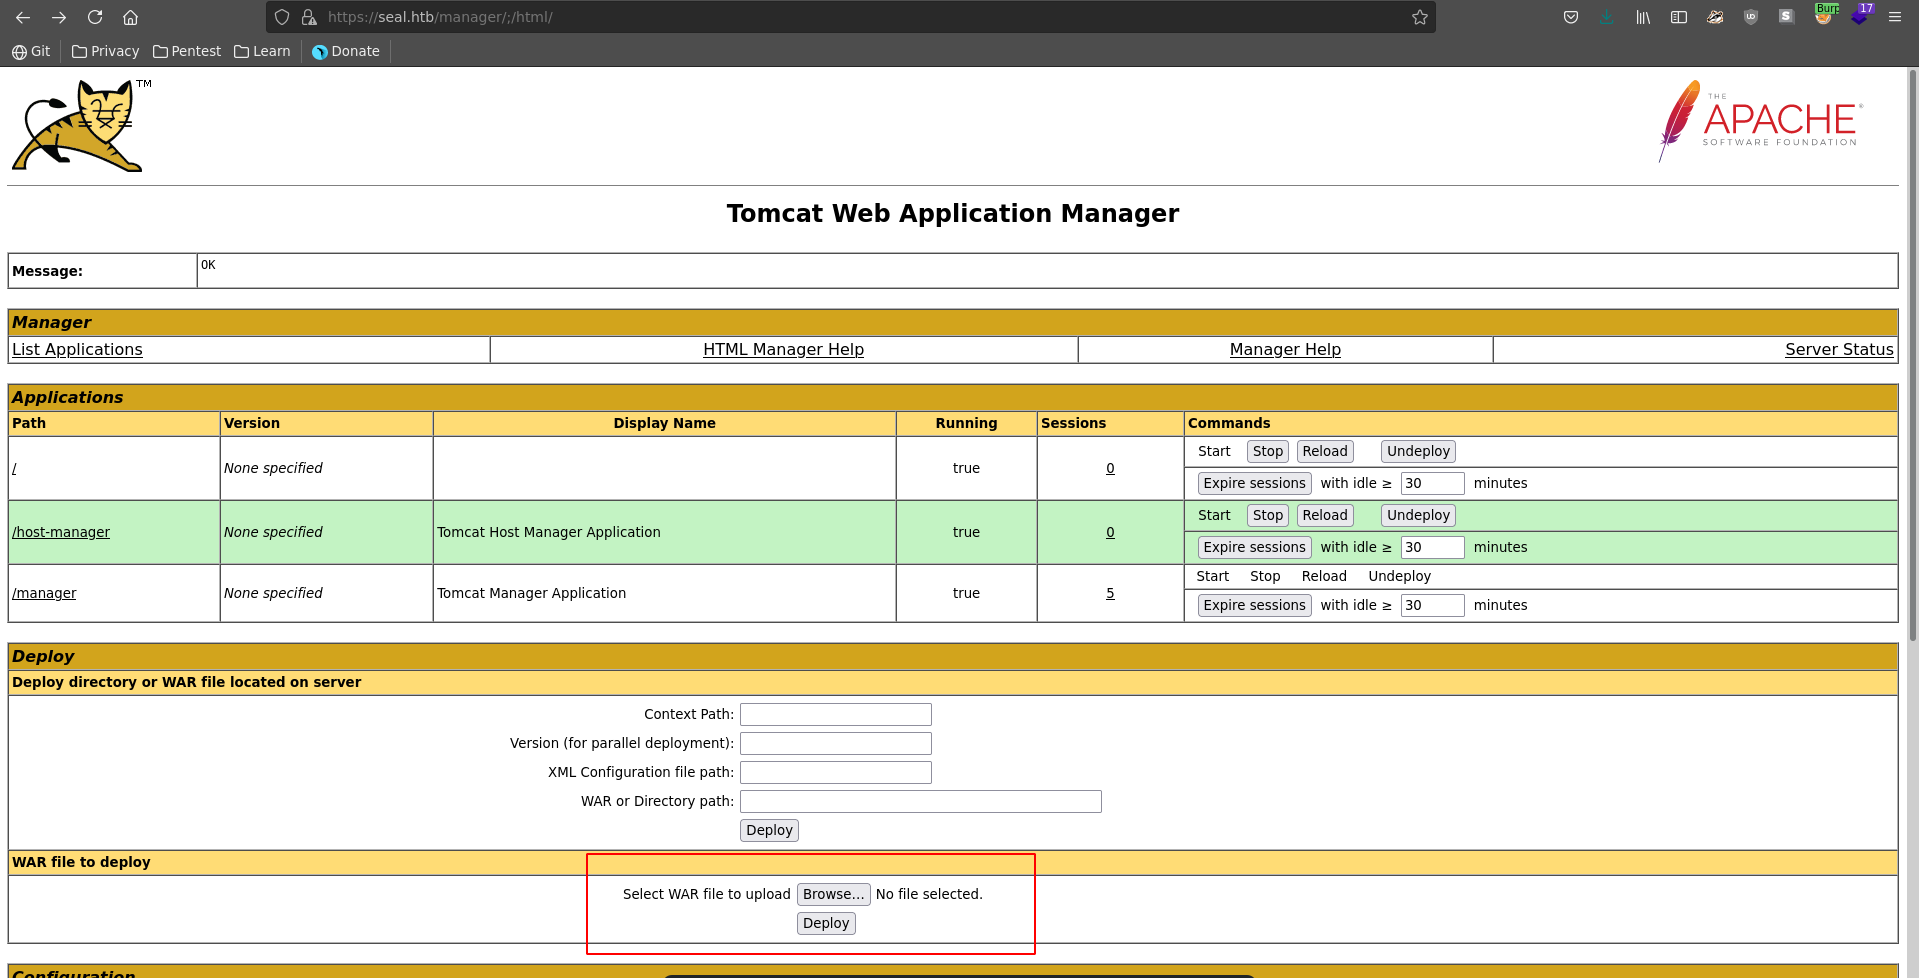
Accessing the page directly at /manager/html seems impossible because of the needed client certificate. We can however modify the path following this PoC by adding a /;/ between /manager and html. This prompts us with a http basic auth where we enter the earlier found credentials.
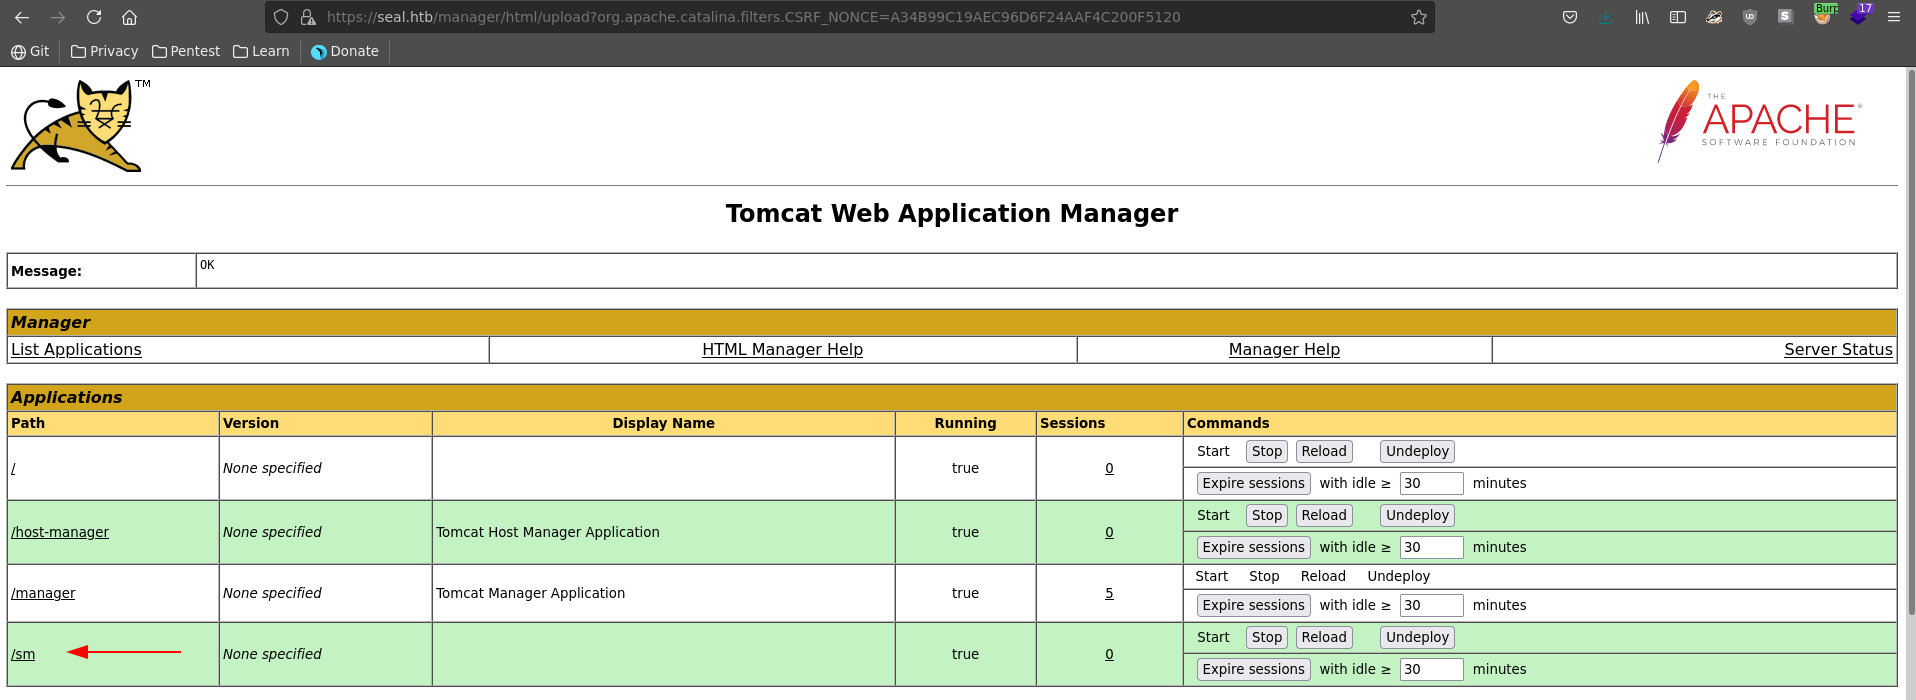
Logged in in the dashboard we can deploy a war file, which get’s unzipped to a jsp and gives us remote code execution.
In a first step we generate our war file with msfvenom pointing to our vpn ip.
1 |
|
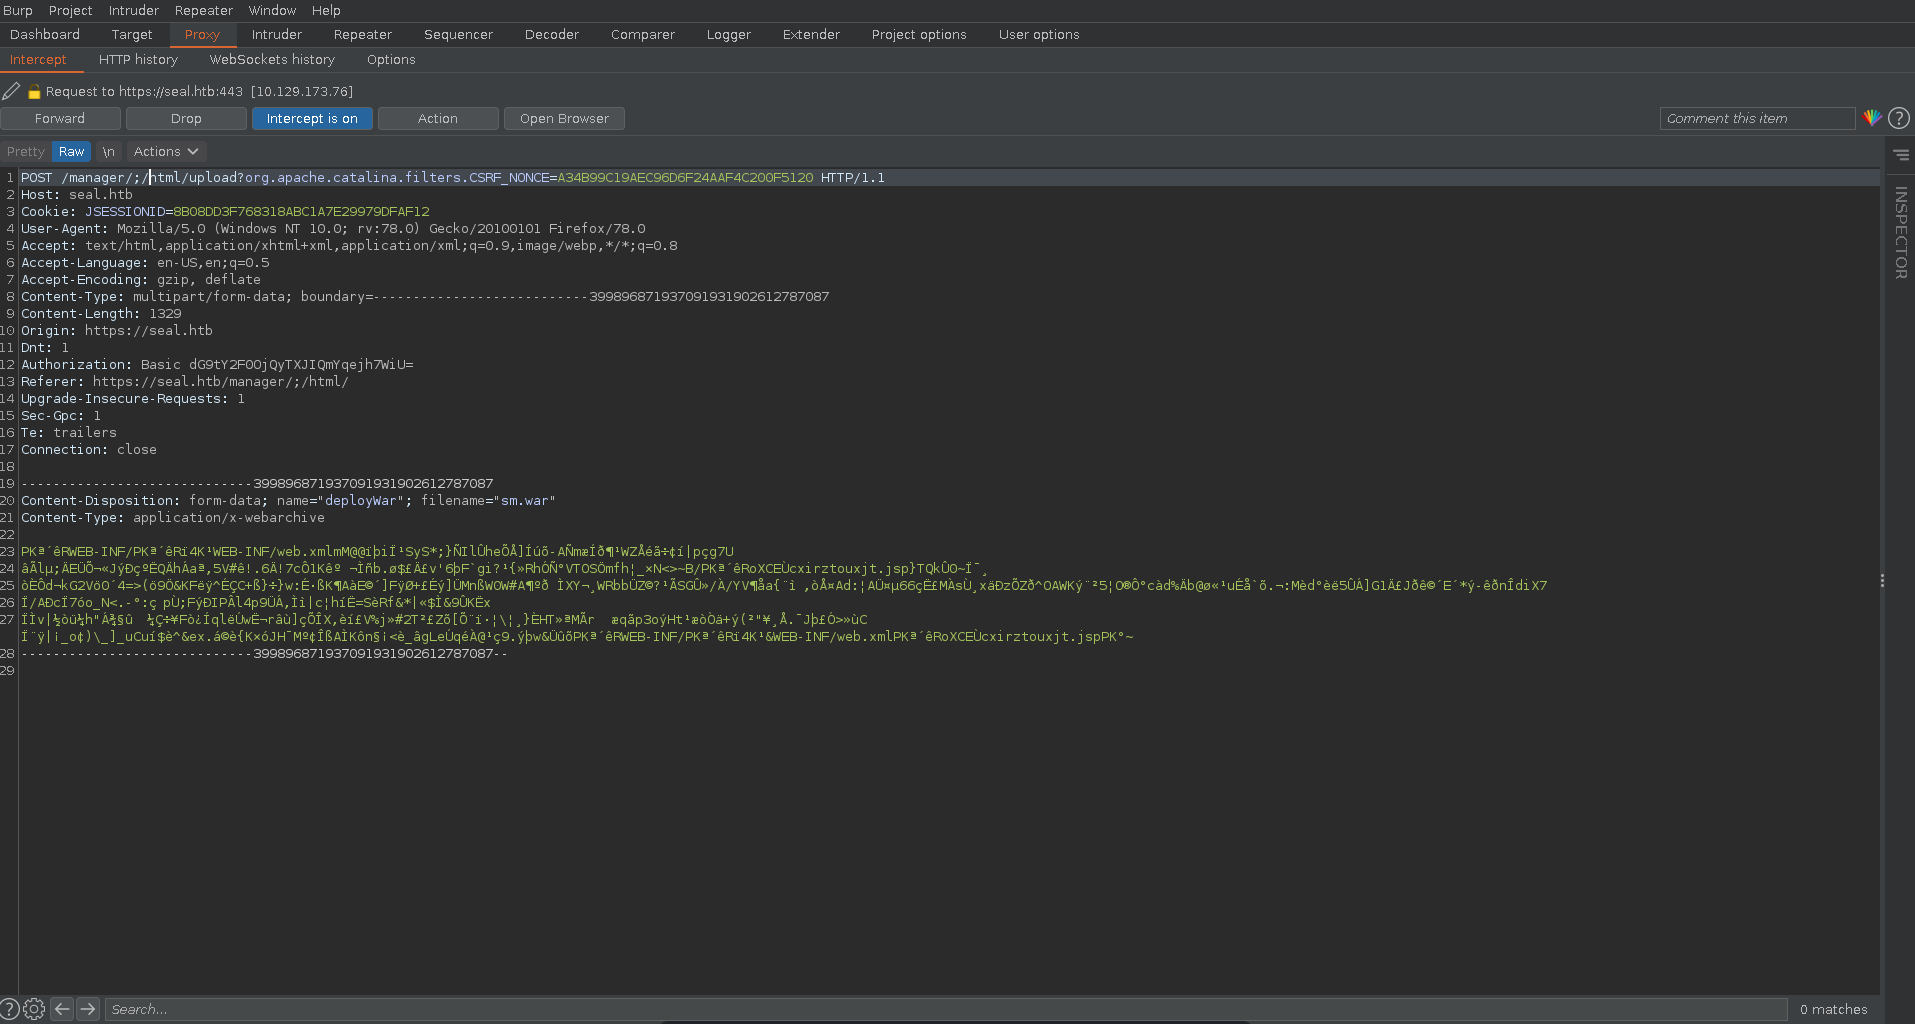
After selecting our file we set burp to intercept the next request and click on deploy.
In burp we also change the url like before putting /;/ between manager and html.
Next we set up a listener on the port we specified before.
1 |
|
We can trigger the uploaded shell by simply clicking on it.
Almost instantly we get a shell as the tomcat user back on our nc listener, which we upgrade and fix the terminals size.
1 |
|
Ansible playbook
Looking around we find a file that looks just like an ansible-playbook configuration file.
/opt/backups/playbook/run.yml
1 |
|
What it does is copy all files from /var/lib/tomcat9/webapps/ROOT/admin/dashboard to /opt/backups/files including symbolically linked ones. Then it compresses them to a tar.gz file and saves it under /opt/backups/archives.
Looking in this directory it seems the configuration file is actively being run by the user Luis since the created files are owned by him.
1 |
|
To exploit this we need a place to write under /var/lib/tomcat9/webapps/ROOT/admin/dashboard. Luckily for us we have write access on the uploads folder.
1 |
|
Now we just need to choose what we want to link. For this we can take any file Luis has read access to. Looking in his home directory we can see an existing .ssh folder which might contain an id_rsa file.
1 |
|
To exploit it we create symbolic link to the key in the uploads directory and wait about one minute.
1 |
|
As soon as a new backup has been created we move it to a new directory under /tmp since the archives directory seems to be cleaned up every 5 minutes.
1 |
|
1 |
|
Once copied we can extract the file and see that the id_rsa file was indeed present in Luis’s home directory.
1 |
|
/tmp/exfil/dashboard/uploads/key
1 |
|
We can use this key now to log in as Luis and grab the user flag after setting the correct permissions on it.
1 |
|
Root
Looking at sudo permissions, we see that Luis can run ansible-playbook on any configuration file which gives us a quick way to get to root.
1 |
|
First we create a yaml config which gives bash the suid bit on the target machine.
sm.yml
1 |
|
Then we run ansible-playbook on the file with sudo.
1 |
|
Checking bash again we see that it has now the suid bit set.
1 |
|
Which means we can simply drop in a rootshell and read the flag.
1 |
|
